From Scribble to Roar: Fun Lion Body Drawing Steps
Lions carry a natural strength that’s easy to admire and rewarding to draw.
Those wide faces, bold eyes, and flowing manes create a shape that’s both powerful and expressive.
Starting with the right shapes and proportions helps you create drawings that feel balanced and lifelike.
In this tutorial, you’ll work through each stage clearly, from basic structure to final details, without feeling overwhelmed.
Learning how the body fits together builds confidence and keeps things fun as you go.
With the right tools, solid practice, and a little patience, sketching a strong, believable lion becomes easier than expected.
Before picking up your pencil, it helps to understand the animal’s form.
Let’s start by looking at what makes a lion look like a lion.
Lions have specific body proportions that make them look powerful and majestic.
The head is large compared to other big cats, and males have that impressive mane.
The body is muscular but lean, with strong legs built for hunting.
One common mistake beginners make is drawing the mane too small or making the legs too thin.
Remember, lions are powerful animals!
Males are larger than females and have manes, while females have sleeker builds. Keep these differences in mind as you draw.
Before we start drawing, let’s make sure you have everything you need.
The good news is that you don’t need expensive supplies to create a great lion drawing.
Most of these items are probably already in your home or classroom.
| MATERIAL | PURPOSE |
|---|---|
| Medium to heavyweight paper that can handle erasing and shading. A4 or 9×12 inches works great for beginners. | |
| HB for sketching, 2B or 4B for darker lines and shading | |
| A soft eraser for clean corrections |
These three basic supplies are all you really need to complete your lion drawing.
However, if you want to add more detail or create different effects, there are a few optional tools you might enjoy using.
Ready to start drawing?
Let’s begin with the basics and build up your lion step by step.
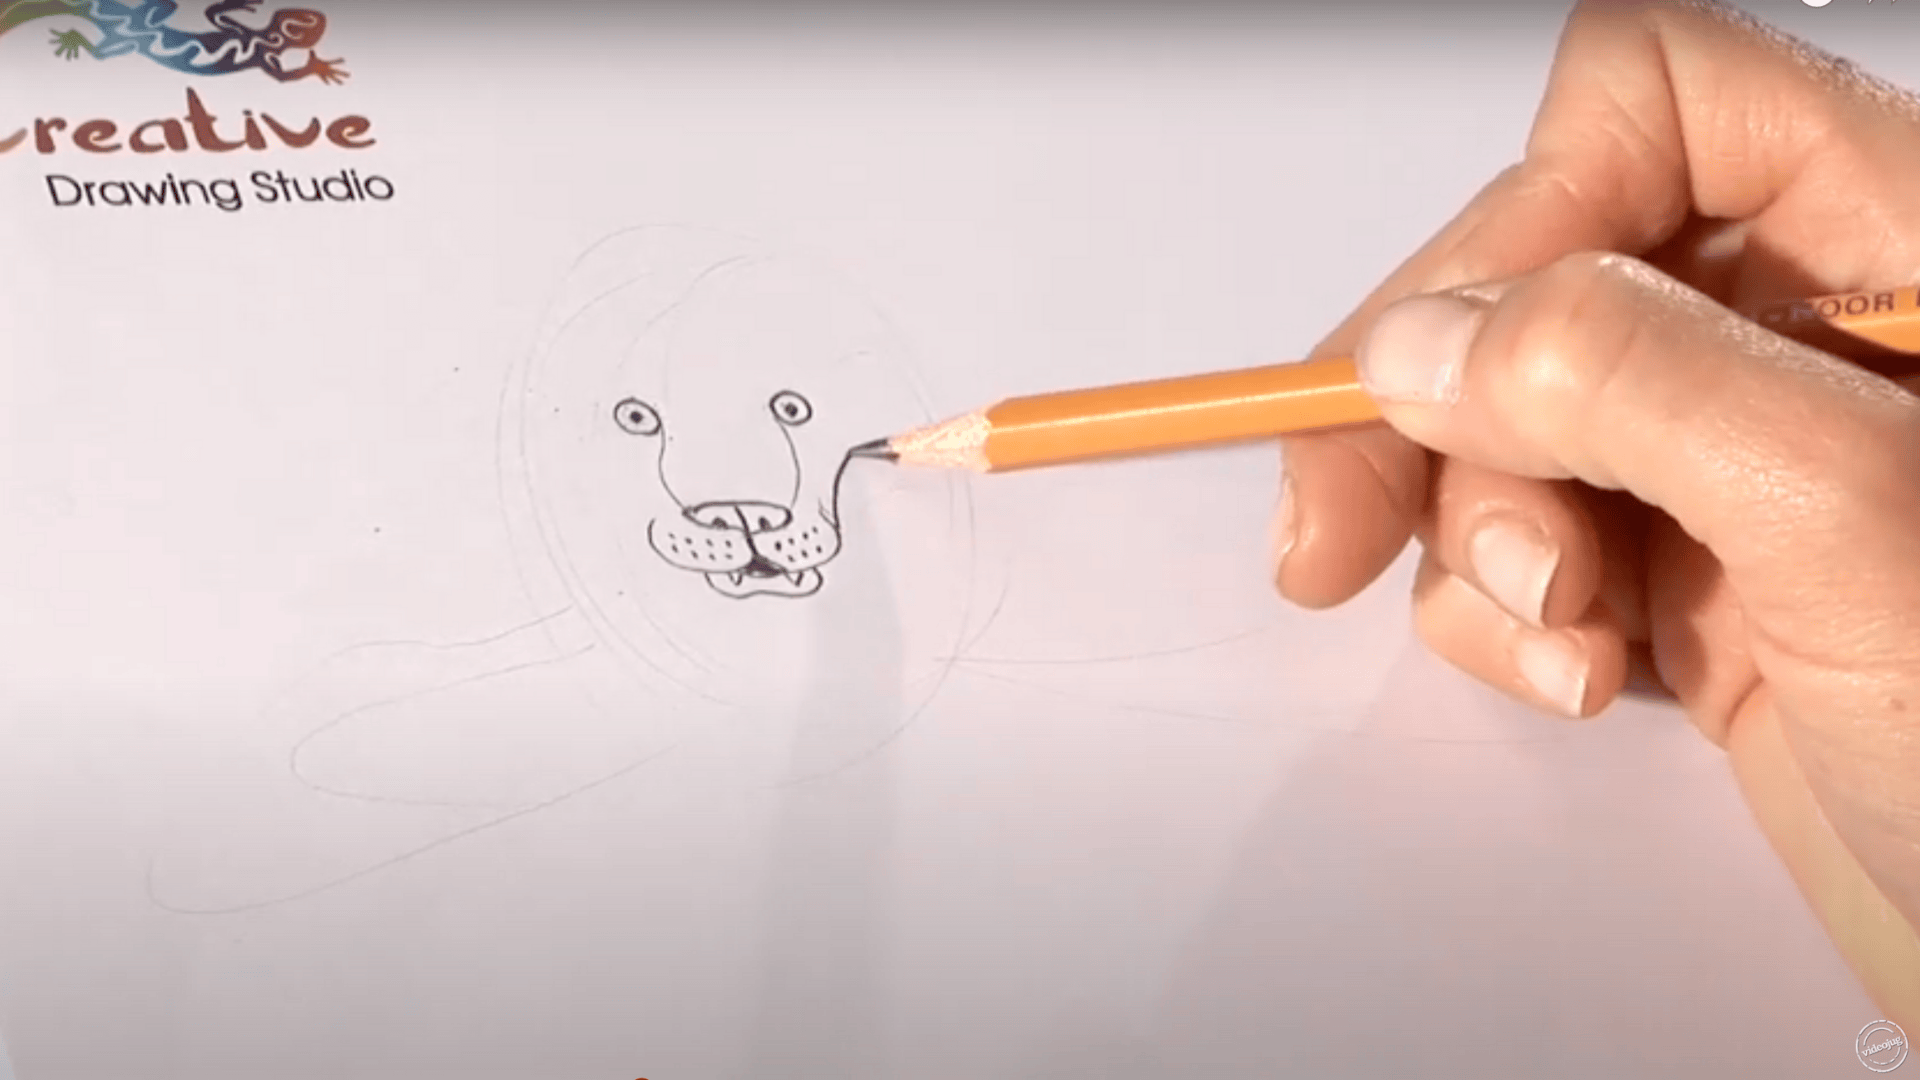
Begin with the lion’s face by placing it roughly in the center of your paper.
Start by drawing a small dot for the eye, then encircle it.
Add a nose beneath the eye and shape the mouth using smooth lines.
Don’t forget to add small dots where the whiskers will go.
Enhance the eyes with darker shading to give the lion a more intense and fierce expression.
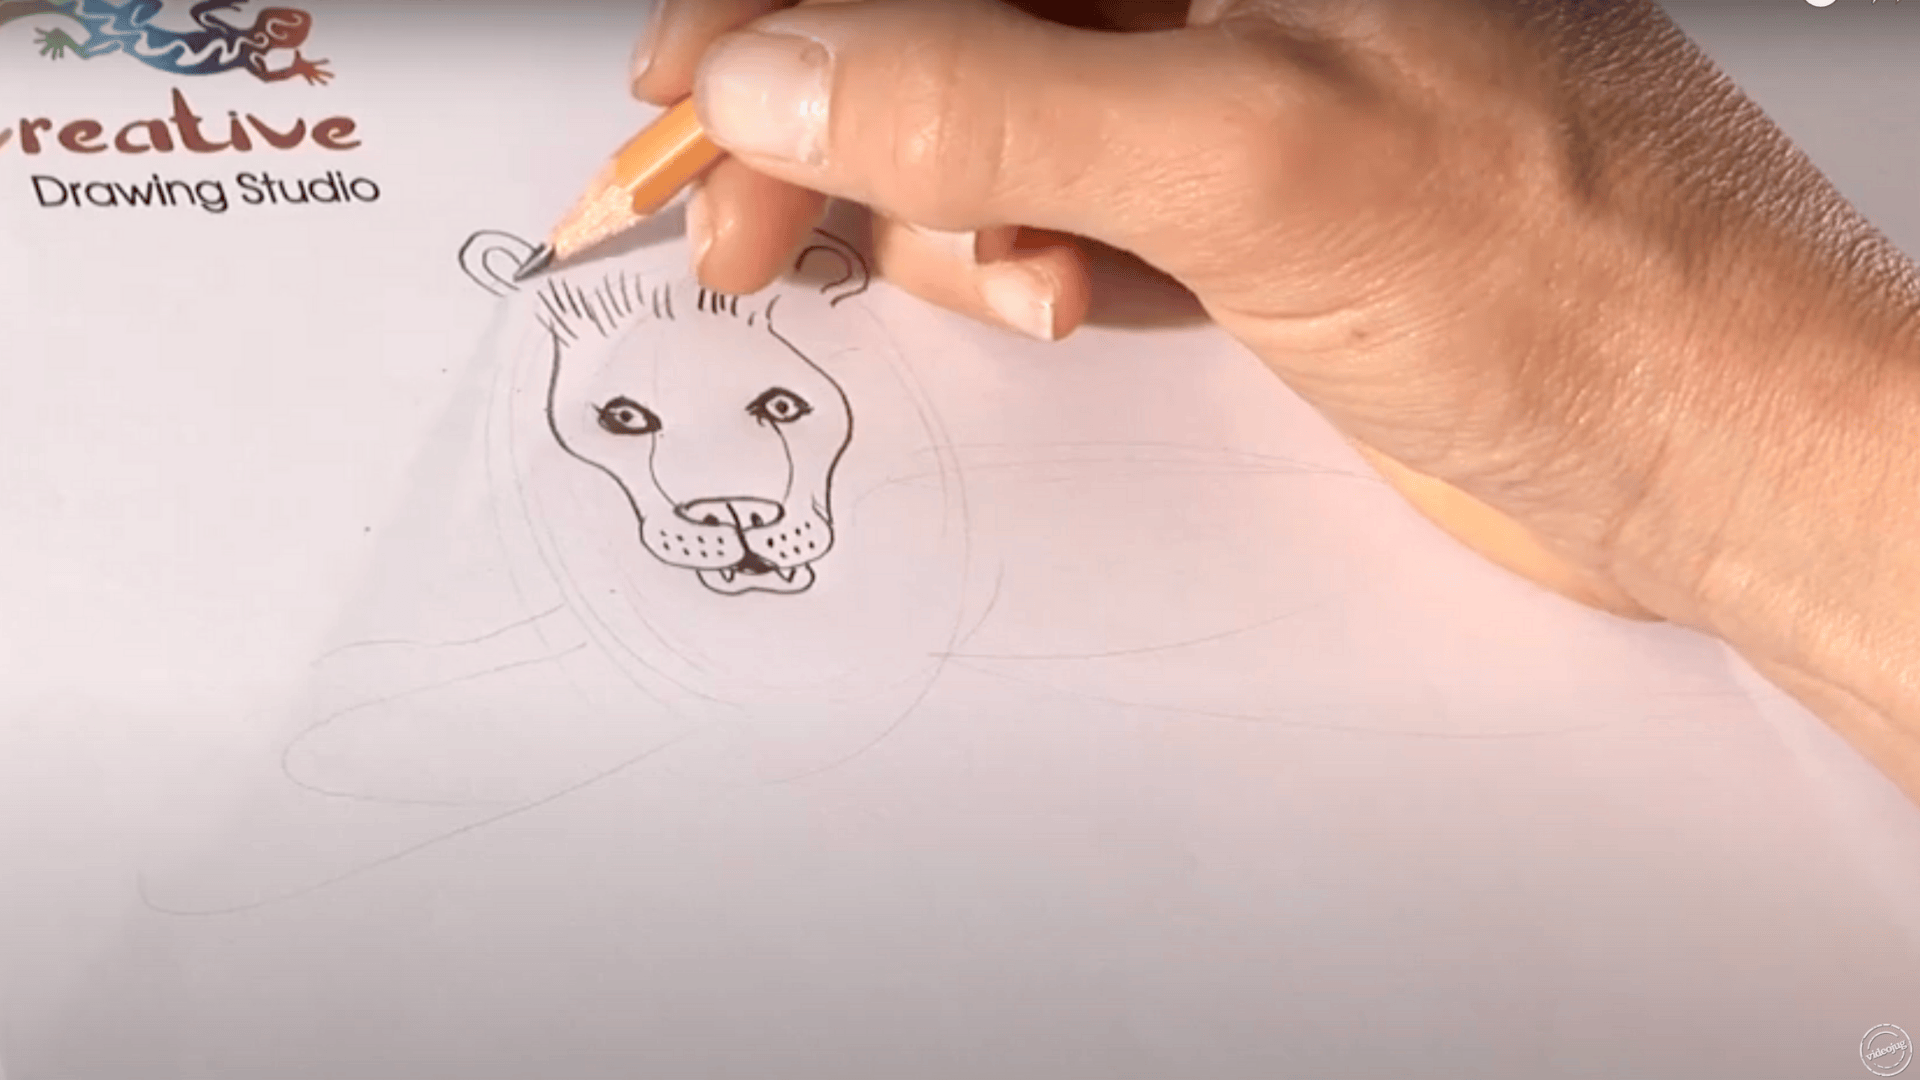
Next, place the ears on both sides of the head.
Sketch them lightly so they can be adjusted later without much erasing.

Draw the outline of the mane starting from the top of the head, flowing outwards, and curving around the ears.
Once you’re happy with the shape, go over it with short, broken lines to mimic the texture of fur and give it a realistic look.
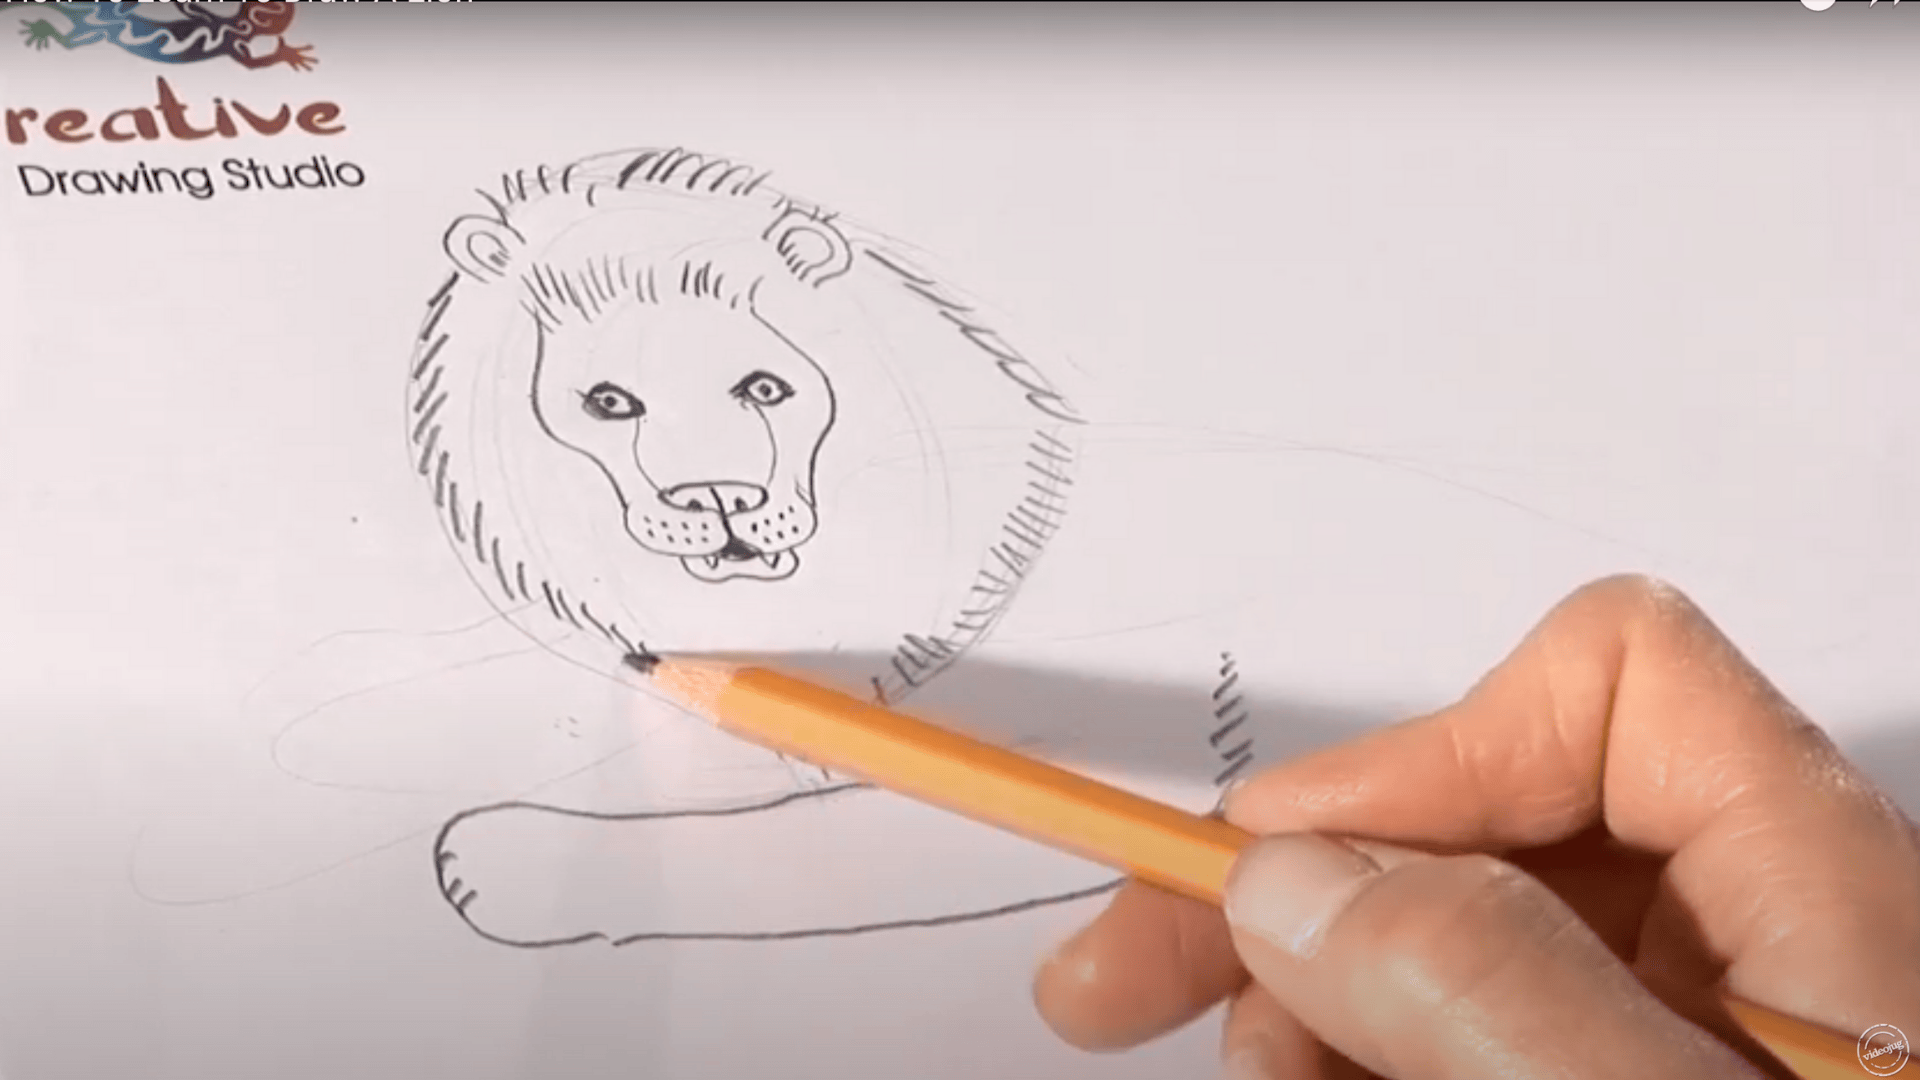
From the base of the mane, draw the front paw with a curved shape.
Change the direction of your lines to create an elbow.
Then, behind this, sketch the second leg slightly offset and higher than the first to show depth and perspective.
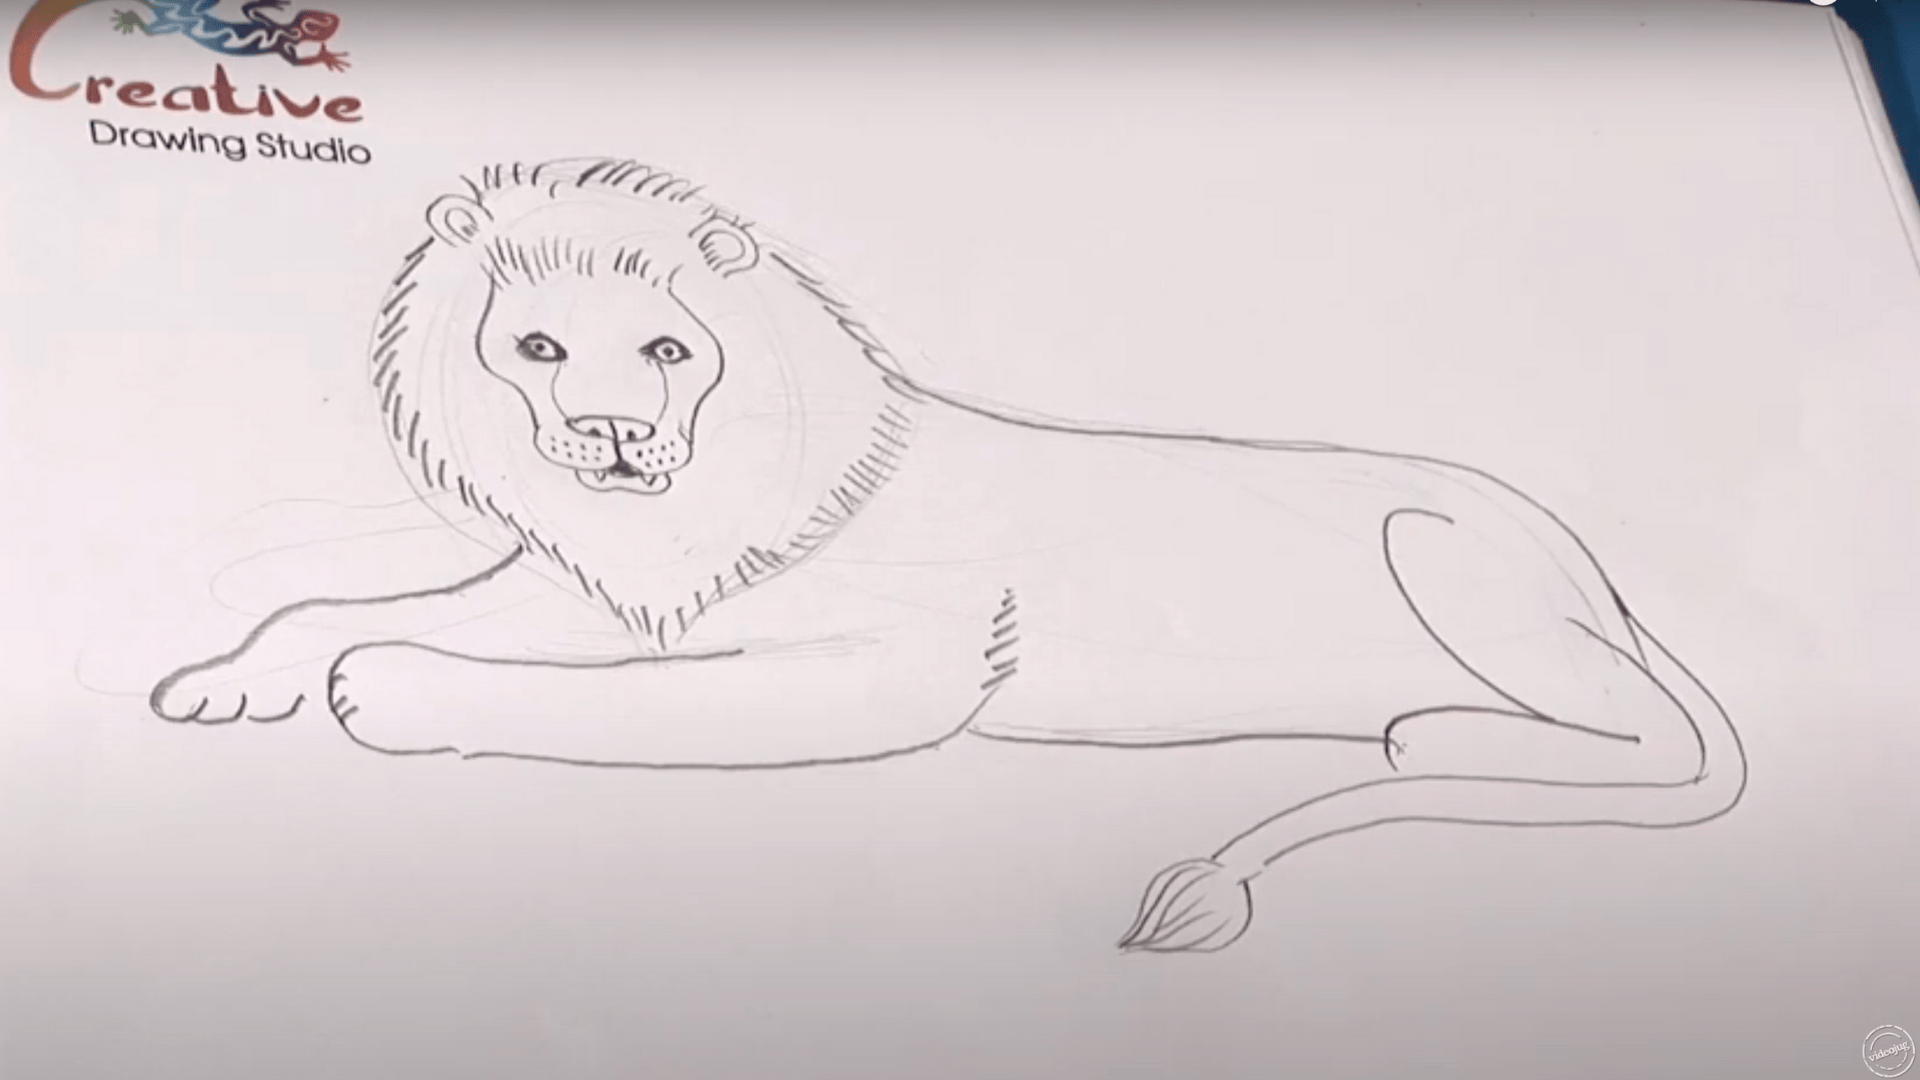
Taper the body backward, drawing the back legs with curvy lines.
Add hip contours and close the form with a hind paw.
Finish the drawing with the tail, starting at the back and curving it around smoothly for a natural finish.
Want to take your lion drawings to the next level?
Here are some practical tips to help you improve more quickly.
Remember, every artist started as a beginner. The more you practice, the better your skills will become.
Don’t get discouraged if your first attempts don’t look perfect, that’s completely normal!
Keep your early drawings so you can see how much you improve over time.
Once you’ve mastered the basic lion, why not try some variations?
These fun poses will help you practice and expand your skills.
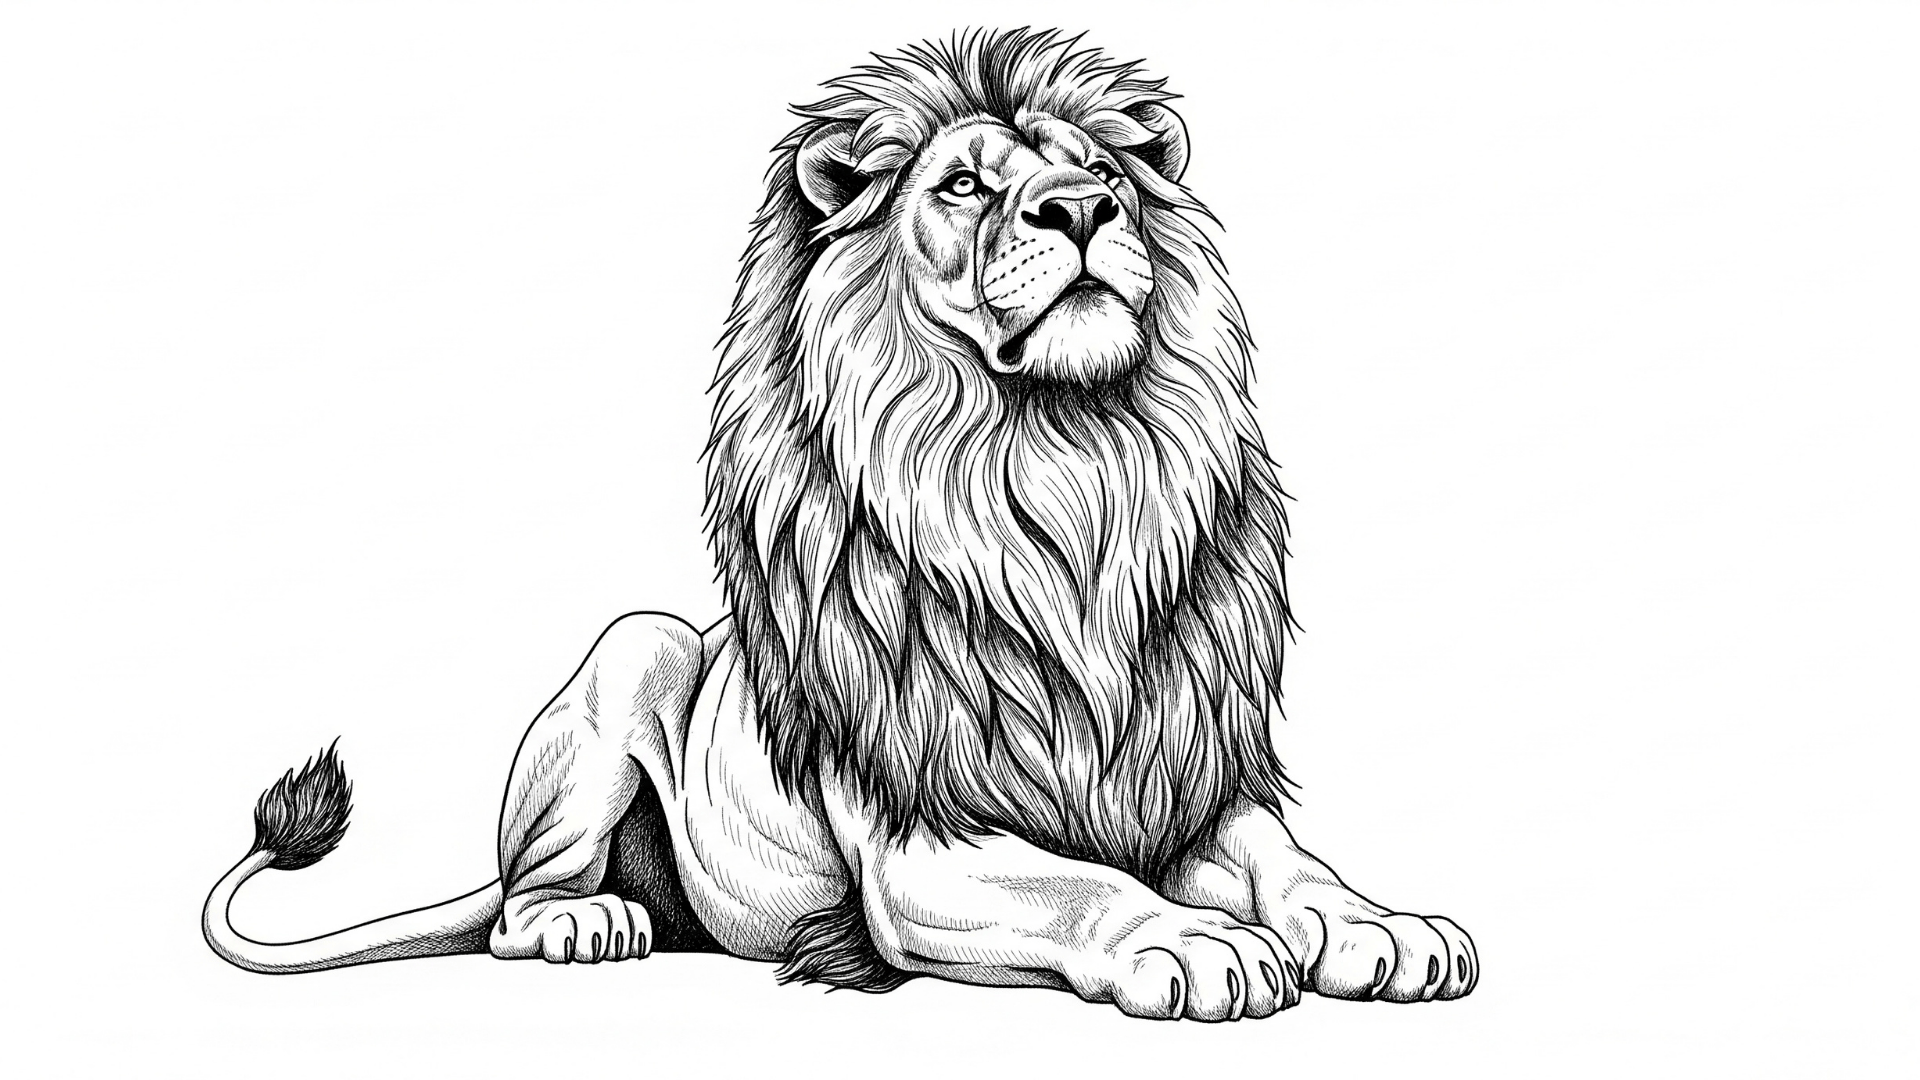
Draw your lion in a regal sitting position with the front legs straight and the back legs tucked under.
This pose shows off the mane beautifully.
Start by positioning the chest upright and proud, then angle the head slightly upward to create a noble appearance.
The tail can wrap around the side of the body, and you can add extra detail to the mane since it’s the focal point in this position.

Open the mouth wide and show those teeth!
Tilt the head back slightly and add wrinkles around the nose for a fierce roar.
Draw the eyes squeezed almost shut to show the intensity of the roar.
The mane should appear fuller around the face as the lion stretches its neck.
Don’t forget to show the tongue and add shading inside the mouth to create depth.
This dramatic pose really brings your lion to life.

Create a peaceful scene with your lion lying down.
Curve the body into a relaxed position with the head resting on the front paws.
The eyes should be closed with gentle lines, and the whole body should look loose and comfortable.
You can position the back legs stretched out or tucked to the side.
Add soft shading to show how the weight of the body presses against the ground, making your drawing look more realistic.
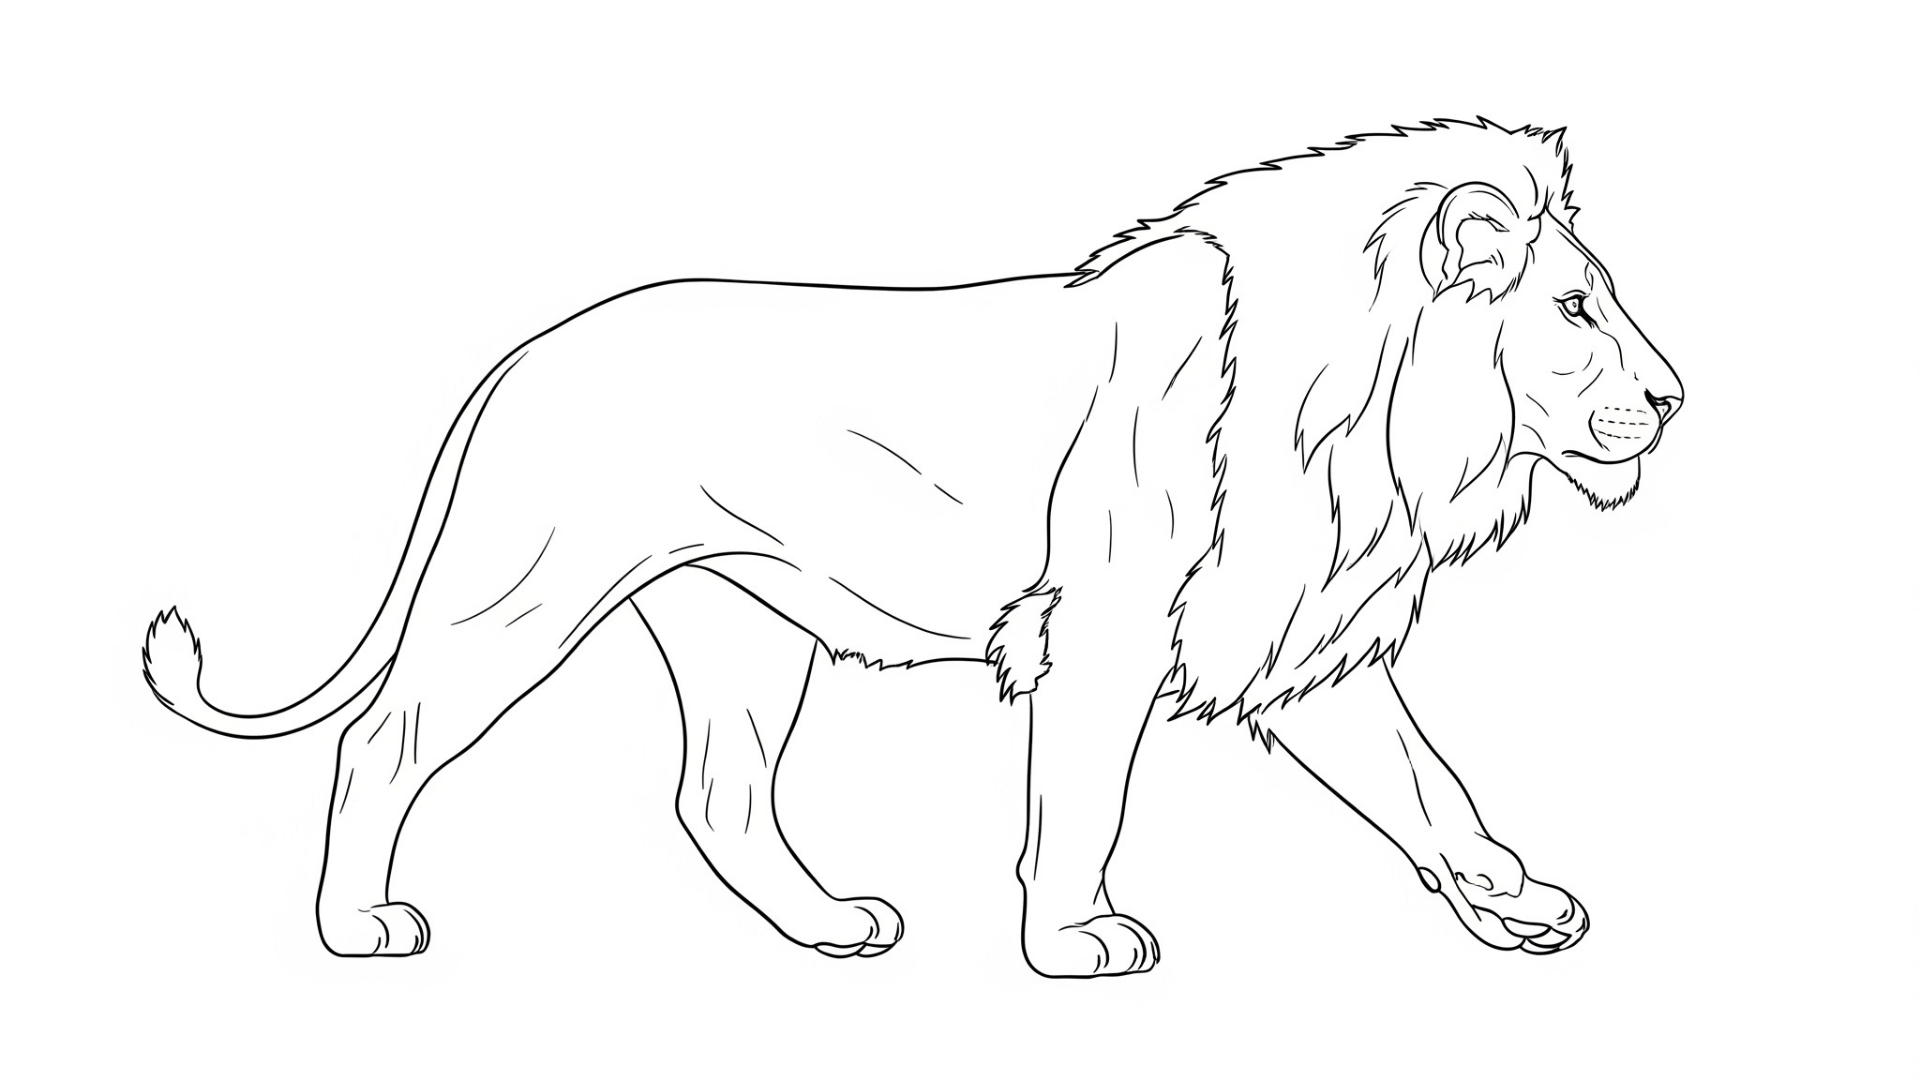
Show movement by drawing one front leg forward and the opposite back leg extended.
This creates a natural walking motion.
The head should be level with the body and facing forward, showing alertness.
Pay attention to how the muscles would flex during movement, the shoulder of the forward leg will be more prominent.
The tail can be curved upward or swaying to the side to enhance the sense of motion in your drawing.
Drawing lions takes time, but every pencil mark builds skill and confidence.
Early sketches might look off at first, and that’s okay.
Don’t erase your first attempts, save them to see how far you come.
Work on smaller parts like the eyes or paws before tackling full poses. Practice often, even for just a few minutes, and improvement will show up faster than expected.
Use reference images to understand how lions move and rest.
Try new positions like sitting, walking, or stretching to keep things interesting.
Stay patient and enjoy the process.
As your hand gets steadier, your lions will grow stronger and more natural.
Keep drawing, keep learning, and let each page tell a stronger story than the last.
Want more awesome craft ideas to keep your kids creating and having fun?
Click here for endless inspiration that’ll turn your home into the ultimate craft adventure zone!