Comment on Master Scones Recipe by Erin @ Sally's Baking
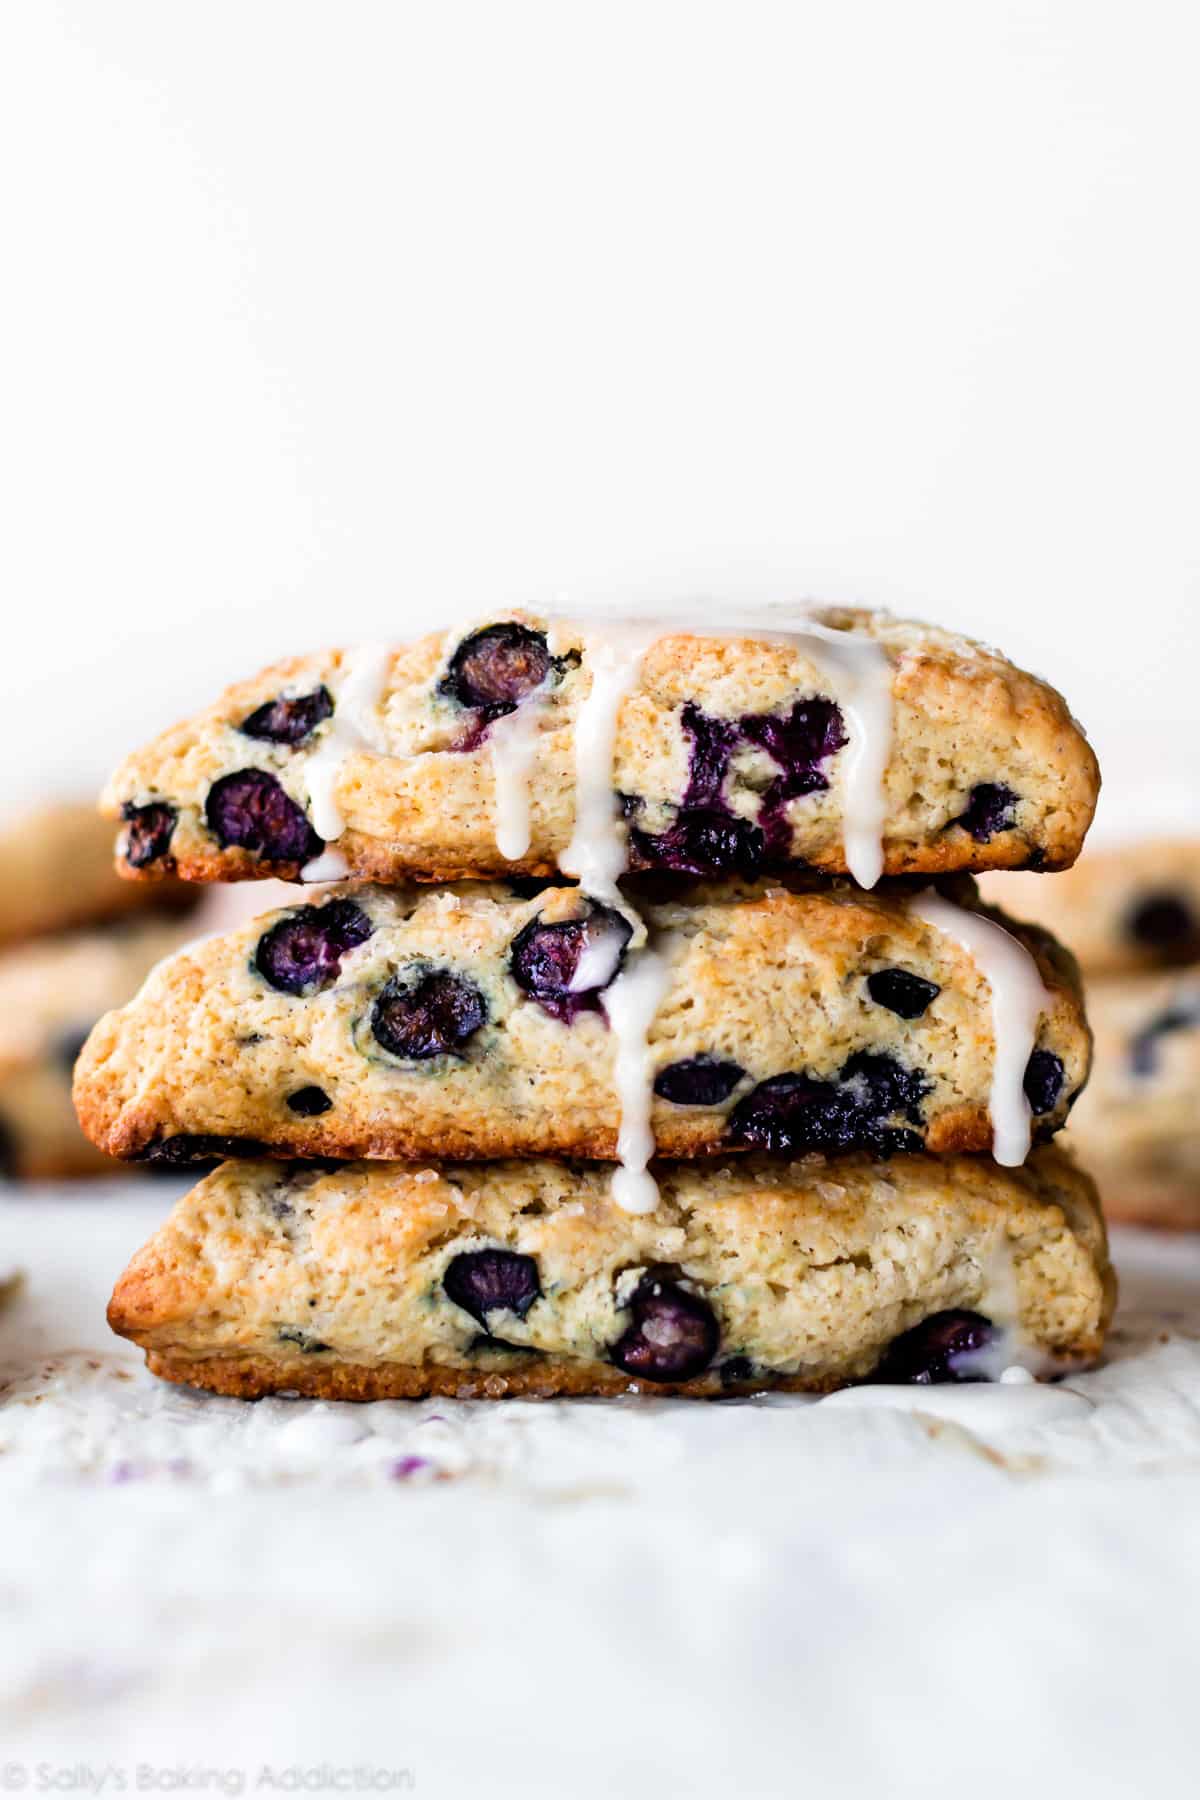
Using my perfected master scone recipe, with a variety of add-ins like chocolate chips, berries, or cheese and herbs. These better-than-the-bakery treats are flaky, flavorful, and moist with crisp crumbly edges. There’s a lot of helpful information and step-by-step photos, but feel free to jump right to the recipe!

Scones are sweet or savory, perfect with coffee and tea, welcome at baby showers, bridal showers, brunch, snack time, bake sales, Mother’s Day, and wherever muffins or coffee are appropriate. (All the time!)
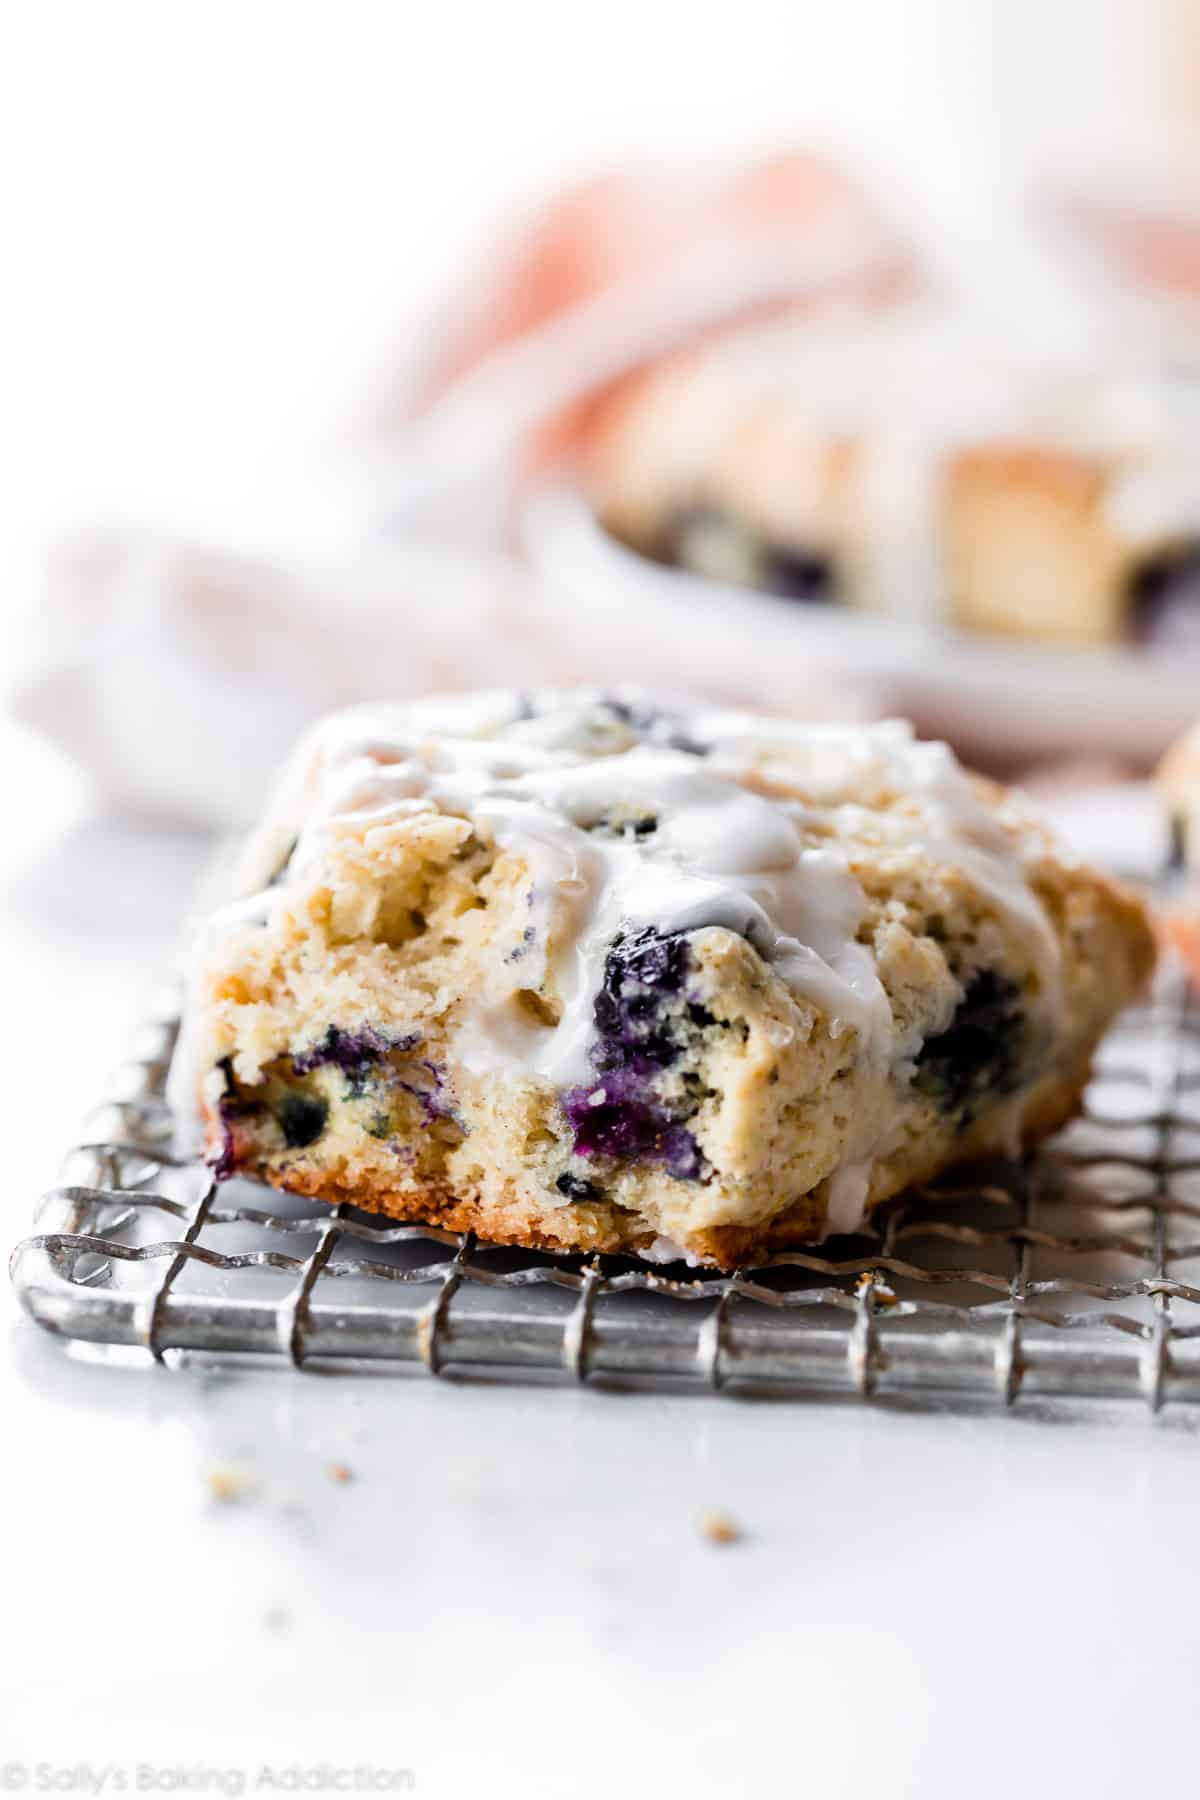
But depending on the recipe and technique, scones can be dry and sandpaper-y with flavor comparable to cardboard. They can also over-spread. My basic scone recipe promises uniquely crisp and buttery scones with crumbly corners and a soft, flaky interior.
I have several scone recipes that begin with the same basic formula. Let’s review the fundamentals so you can learn how to make the best scones. Sit back because there’s a lot to cover in this post!

Depending where you live, the term “scone” differs. English scones are more similar to American biscuits and they’re often topped with butter, jam, or clotted cream. American scones are different, but different isn’t necessarily a bad thing! Today’s scones are sweeter, heavier, and aren’t usually topped with butter because there’s so much butter IN them. Sweetness aside, there’s still room for vanilla icing or a dusting of confectioners’ sugar on top. By the way, here’s my favorite recipe for traditional scones.
Scones are leavened with baking powder, so making them is generally quick. Blueberry scones are my favorite variety, but that quickly switches to pumpkin scones in the fall months! (Here are all my scone recipes.)
Let’s start with a video tutorial.
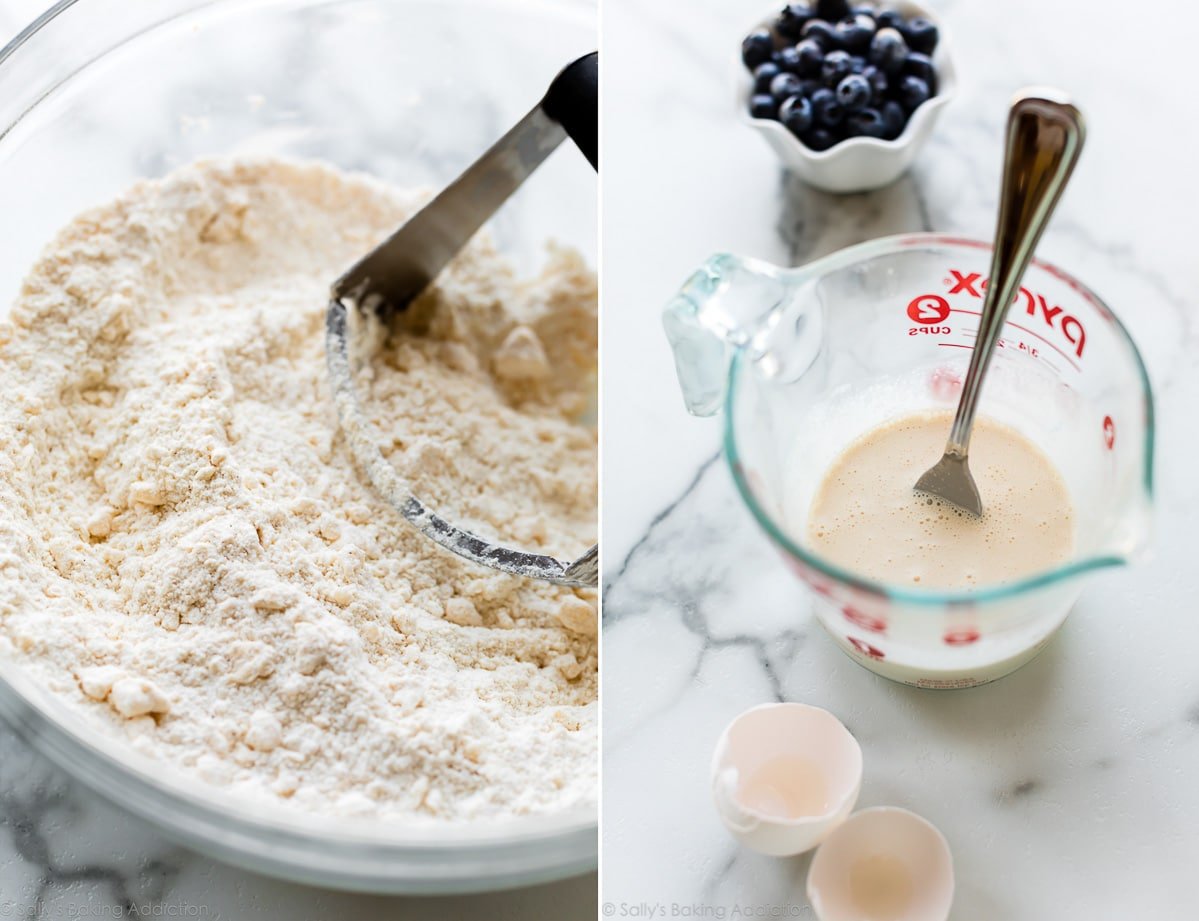
You only need 7-9 ingredients for my master scone recipe.
And don’t forget about the add-ins! Scroll down to see all my favorite scone flavors.

So now that you understand which ingredients are best, let’s MAKE SCONES!

Keeping scone dough as cold as possible prevents over-spreading. When scones over-spread in the oven, they lose the flaky, moist, and deliciously crumbly texture. In other words, they’re ruined. But the easiest way to avoid disaster is to use cold ingredients like cold heavy cream, egg, and butter.
But is the real key to success.
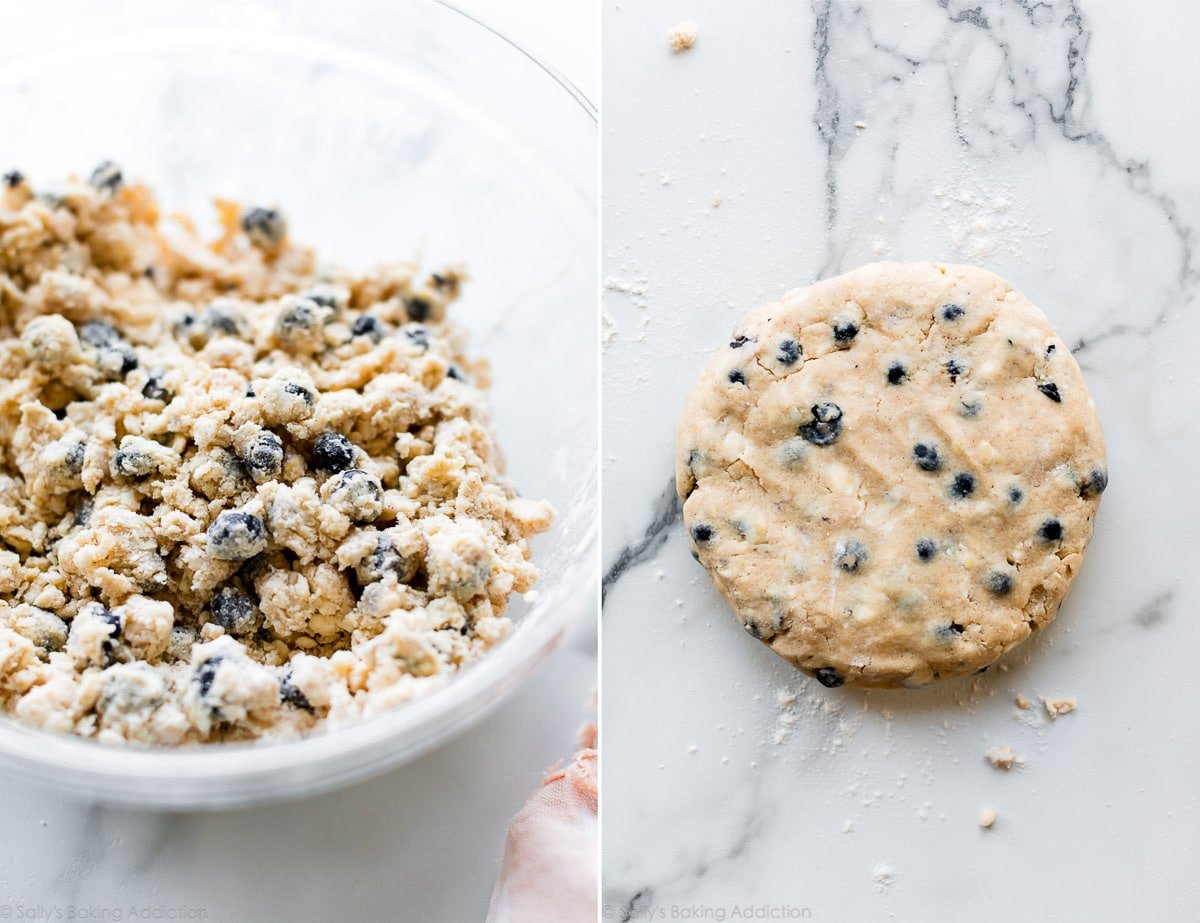
Like with pie crust, work the cold butter into the dry ingredients to create crumbs. The butter/flour crumbs melt as the scones bake, releasing steam and creating air pockets. These pockets create a flaky center while keeping the edges crumbly and crisp. Refrigerated butter might melt in the dough as you work with it, but will hold out until the oven. And the finer the pieces of cold butter, the less the scones spread and the quicker the butter mixes into the dry ingredients. Remember, you don’t want to over-work scone dough.
If you take away anything from this post, let these be it!
See #2 and #3. 🙂

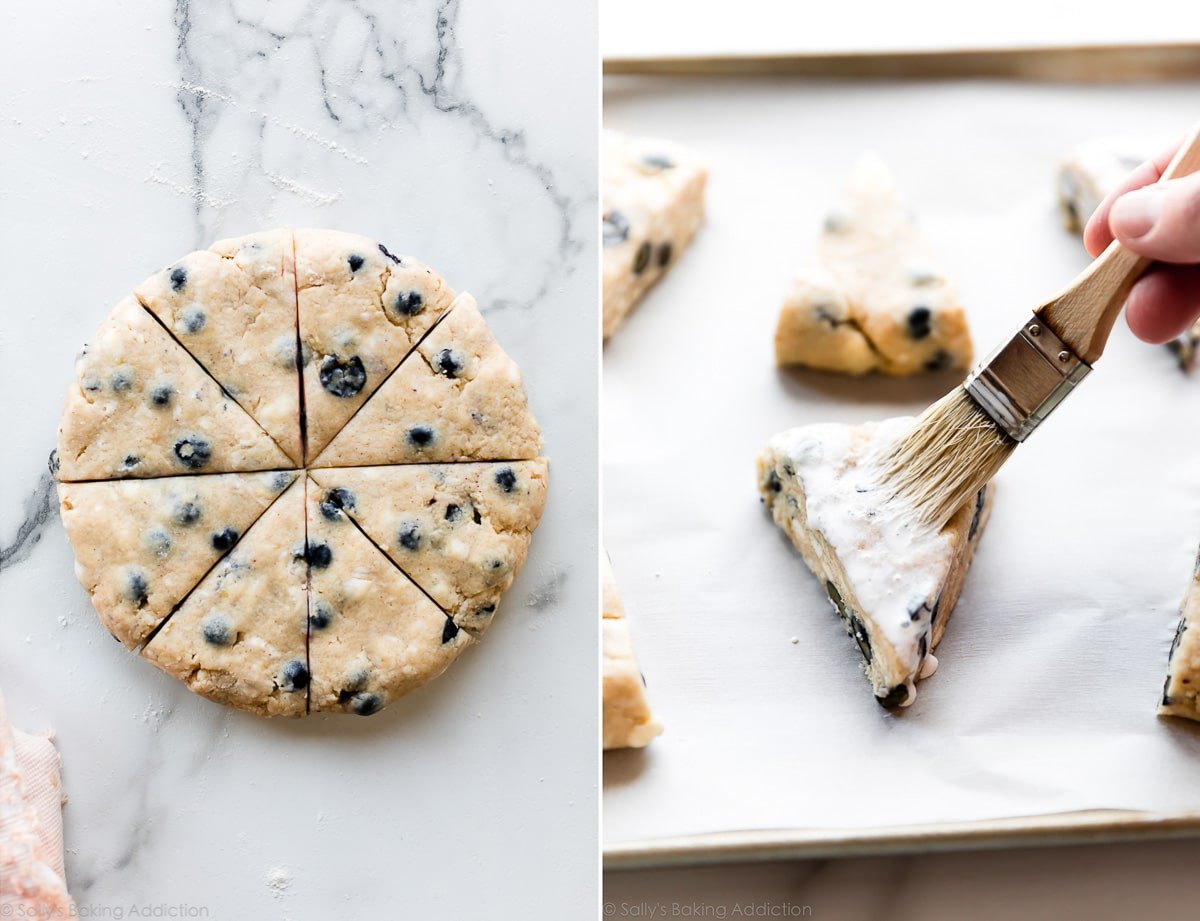
I used to be totally against freezing scone dough. You see, the baking powder is initially activated once wet and if you hold off on baking, the scones won’t rise as much in the oven. However, the decrease in rise is so slight that it doesn’t make a noticeable difference. In fact, you can even shape this scone dough into wedges and refrigerate overnight before baking.

Using the master recipe below as a starting point, toss in your favorite add-ins like white chocolate chips, toasted pecans, sweetened or unsweetened coconut, dried cranberries, peanut butter chips, etc. If it’s a particularly wet add-in like chopped peaches, blot them with a paper towel before adding to the dough. Top with lemon curd, raspberry sauce, or any of the suggested toppings below. Above all, have fun finding your favorite flavor!
Feel free to email or share your recipe photos with us on social media. 🙂
Use this basic scone dough for any sweet scone variety. See blog post for a couple savory scone options. Feel free to increase the vanilla extract and/or add other flavor extracts such as lemon extract or coconut extract. Read through the recipe before beginning. You can skip the chilling for 15 minutes prior to baking, but I highly recommend it to prevent the scones from over-spreading.